This is in answer to Steve's question (in one of the comments), asking if it was possible to place the actual time and date into separate in-game variables. Short answer is "Yes, it is!"
I'm still working on my full calendrical system script, but the best time system that I've found is this one:
This video shows how to use the demo script, downloadable here.
Alternatively, the "original" forum post goes into much more detail.
02 September 2009
01 September 2009
19 May 2009
17 May 2009

Still Here!
Apologies for the lack of updates. I haven't abandoned this blog. Things have been hectic and, due to my hard drive failing, lost my data, including my RPG Maker programs and projects. I'm not really bothered by it because they can be redone, and just like writing, the first draft is always the rough draft anyway.
Thanks for the comments and support. I've just re-downloaded RMVX, so will be making full use of it again. And will answer your question, Steve, soon. Just please bear with me.
Thanks for the comments and support. I've just re-downloaded RMVX, so will be making full use of it again. And will answer your question, Steve, soon. Just please bear with me.
Time/Date Formats
In yesterday's entry, System Time/Date Script, I showed how to use the built-in Time function to display the current (system) time and date.
To change format, the strftime method has a number of options available.
Its basic format is
where format is the format string to be used, which may be specified with the following:
So, as an example, to display the full date, including day, month and year, strftime would be set to:
The result would be
And that's it!
To change format, the strftime method has a number of options available.
Its basic format is
strftime(format)
where format is the format string to be used, which may be specified with the following:
- %A - Full day of the week (Sunday, Monday, etc.)
- %a - Abbreviated day of the week (Sun, Mon, etc.)
- %B - Full month (January, February, etc.)
- %b - Abbreviated month (Jan, Feb, etc.)
- %c - Current Date and Time (system clock format)
- %d - Day of the month (01-31)
- %H - Time of day in 24-hour format (00-23)
- %I - Time of day in 12-hour format (01-12)
- %j - Day of the year (001-366)
- %M - Minutes (00-59)
- %m Numerical month of the year (01-12)
- %p - Displays AM or PM after the time
- %S - The number of seconds (00-60, 60 being a "leap second")
- %U - Week of the year, the first week starting with the first Sunday (00-53)
- %W - Week of the year, the first week starting with the first Monday (00-53)
- %w - Day of the week (0-6, 0 denoting Sunday)
- %X - Displays the Time
- %x - Displays the Date
- %Y - Displays the Year as a 4-digit number (2009)
- %y - Displays the Year as a 2-digit number (00-99)
- %Z - Displays the default (system) Time Zone
- %% - Displays a % character
So, as an example, to display the full date, including day, month and year, strftime would be set to:
strftime = ("%A, %d %B, %Y")
The result would be
Tuesday, 20 May, 2009
And that's it!
System Time/Date Script
RMXP and RMVX has a built-in Time function that allows the display of the current date and time (based on the system clock). I found this by accident while sifting through the Help file - actually while searching for Bitmap and Sprite management - and after some experimentation discovered how to place it in windows.
To use it, there are two functions to be aware of:
This reads the current time and date from the system clock.
This converts the time into a string, using the time of day (in 12-hour format), minutes and seconds, as well as showing AM/PM.
So to add the time and date, we can add the following:
What this will do is store the time/date stamp format into variables and convert them to strings so that they can then be "drawn" in a window.
In RMXP, the following script can be used to replace the default. In RMVX, create a new script called Window_PlayTime:
To make this work in RMVX, add the following to Scene_Menu:
In the start definition routine, add
where X and Y are the x- and y-coordinates for the window placement.
Add the following to the terminate definition routine:
This is to ensure that the window doesn't stay onscreen when the status menu has been exited.
And finally, add the following to the update definition routine:
This is to ensure that the time refreshes every second while on the status menu.
The resultant "Play Time" window should now contain the current time and date, thus:
And that's it, but the strftime element does have a number of different format options, which I'll detail in the next entry.
To use it, there are two functions to be aware of:
Time.now
This reads the current time and date from the system clock.
strftime("%I:%M:%S %p")
This converts the time into a string, using the time of day (in 12-hour format), minutes and seconds, as well as showing AM/PM.
So to add the time and date, we can add the following:
t = Time.now
time = t.strftime("%I:%M:%S %p")
date = t.strftime("%a, %d %b, %Y")
time = t.strftime("%I:%M:%S %p")
date = t.strftime("%a, %d %b, %Y")
What this will do is store the time/date stamp format into variables and convert them to strings so that they can then be "drawn" in a window.
In RMXP, the following script can be used to replace the default. In RMVX, create a new script called Window_PlayTime:
#=================================================================
# ** Window_PlayTime
#-----------------------------------------------------------------
#  This window displays play time on the menu screen.
#=================================================================
class Window_PlayTime < Window_Base
  #---------------------------------------------------------------
  # * Object Initialization
  #---------------------------------------------------------------
  def initialize
    super(0, 0, 160, 64)
    self.contents = Bitmap.new(width - 32, height - 32)
    refresh
  end
  #---------------------------------------------------------------
  # * Refresh
  #---------------------------------------------------------------
  def refresh
    self.contents.clear
    self.contents.font.size = 16
    t = Time.now
    time = t.strftime("%I:%M:%S %p")
    date = t.strftime("%a, %d %b, %Y")
    self.contents.font.color = normal_color
    self.contents.draw_text(0, -2, 140, WLH, date, 1)
    self.contents.draw_text(0, 14, 140, WLH, time, 1)
  end
  #---------------------------------------------------------------
  # * Frame Update
  #---------------------------------------------------------------
  def update
    super
    if Graphics.frame_count / Graphics.frame_rate != @total_sec
      refresh
    end
  end
end
RMXP will display the replacement time/date in the default "Play Time" window on the menu status.To make this work in RMVX, add the following to Scene_Menu:
In the start definition routine, add
@window_playtime = Window_PlayTime.new
@window_playtime.x = X
@window_playtime.y = Y
@window_playtime.x = X
@window_playtime.y = Y
where X and Y are the x- and y-coordinates for the window placement.
Add the following to the terminate definition routine:
@window_playtime.dispose
This is to ensure that the window doesn't stay onscreen when the status menu has been exited.
And finally, add the following to the update definition routine:
@window_playtime.update
This is to ensure that the time refreshes every second while on the status menu.
The resultant "Play Time" window should now contain the current time and date, thus:
Tue, 19 May, 2009
12:33:22 PM
12:33:22 PM
And that's it, but the strftime element does have a number of different format options, which I'll detail in the next entry.
Miscellaneous Utilities
A number of useful utilities to aid in game-making with RM2K3 have been produced, aside from the Character Creators.
The following utilities are designed for "hacking" resources:
Other useful programs that can be used are:
The following utilities are designed for "hacking" resources:
- ResHack (RM2K/3) - Short for Resource Hack, this great utility allows the hacking of games or RM2K. With it, game icons, text, etc. can be modified to suit individual needs.
- RM Reck (RM2K/3) - Similar to ResHack (above), it allows game icon, glyphs, and even logo screens to be changed. This is compatible with both RM2K and RM2K3.
- Animget - This useful utility enables ripping of sprites and other animations, mostly from emulators. Once it's been activated, it runs in the background and saves snapshots every 0.1 seconds for appropriate resource modification later.
Other useful programs that can be used are:
- RMTool (RM2K/3) - It scans RPG Maker games for missing files and gives instructions on how to fix it. For example, if a MIDI or particular graphics file is missing from the game's Project folder, this tool will tell you which one is missing. Note that it was specifically made for RM2K, but works as well with RM2K3, except for 2K3-specific folders (i.e. System2, BattleChars, CharSets, etc.); they just won't be scanned.
- Zorn's RM2K Tool (Direct Download) - A solid utility that allows random creation of Game Titles, Hero Names, Item Names, Equipment Names and Skill Names (using an editable external text file). It also has a few tutorials built in. These have been designed for RM2K, but should also work with RM2K3.
Window & Scene Wizard
If you're like me and *hate* making windows and their accompanying scenes - at least when it comes to positioning onscreen - there is a useful utility called the Window & Scene Wizard (WSW). Actually it's compiled using RGSS and runs standalone or from with RMXP itself.
You can find a demo, along with instructions and downloads, at Creation Asylum. Note: The first download site no longer hosts the files, so be sure to use the second download site instead.
The WSW works very well, using the mouse and keyboard fluently to create windows. You can create ordinary windows as well as menus, add text, icons and pictures, as well as parameters and other details.
When your finished product is saved, the Window and Scene scripts will be saved in .TXT format. From there you can copy and paste into RMXP and use them for your newly created windows.
The only problem I have with the WSW, however, is that if you create a blank window (or a set of blank positioned windows), it also contains extra, generic crap you don't really need. It's not difficult to delete it, but if you don't know too much about RGSS, it can mess up and you'll receive a few errors.
Work on the WSW stopped after v1.0, since the final entry in the forum was back in 2006, and nothing else has become of it. It's still a good program/utility nevertheless, for learning more about RGSS if for nothing else.
You can find a demo, along with instructions and downloads, at Creation Asylum. Note: The first download site no longer hosts the files, so be sure to use the second download site instead.
The WSW works very well, using the mouse and keyboard fluently to create windows. You can create ordinary windows as well as menus, add text, icons and pictures, as well as parameters and other details.
When your finished product is saved, the Window and Scene scripts will be saved in .TXT format. From there you can copy and paste into RMXP and use them for your newly created windows.
The only problem I have with the WSW, however, is that if you create a blank window (or a set of blank positioned windows), it also contains extra, generic crap you don't really need. It's not difficult to delete it, but if you don't know too much about RGSS, it can mess up and you'll receive a few errors.
Work on the WSW stopped after v1.0, since the final entry in the forum was back in 2006, and nothing else has become of it. It's still a good program/utility nevertheless, for learning more about RGSS if for nothing else.
System Graphics - Part 2
System 2 is the "Battle Menu Set", used in battles to determine the cursor for targeting enemies and allies. It also displays the ATB bar and the numbers for HP and MP display in gauge type battles (set in the "Battle Layout" options of the Database).
All In Gold
 This was the first I ever created (or re-created would be more accurate). The numbers on the gauge aren't really that clear, but I kept it as is for posterity.
System2 Template
 This is a "default" template for creating your own System2 designs. The image size is 8x96.
 This template shows the component elements of the above template.
1: The three-frame animation sequence for the left arrow.
2: The three-frame animation sequence for the down arrow.
3: The numbers for displaying HP and SP values.
A, B and C are the frames for the HP, SP and ATB bars respectively.
D: This is usually kept blank (although I'm not entirely sure what this is used for).
E: These five blocks are for the gauge colors, displayed when the "Battle Layout" is set to "Gauge".
F: This is the gauge for the ATB, which you'll note has two bars instead of one.
All In Gold
 This was the first I ever created (or re-created would be more accurate). The numbers on the gauge aren't really that clear, but I kept it as is for posterity.
System2 Template
 This is a "default" template for creating your own System2 designs. The image size is 8x96.
 This template shows the component elements of the above template.
1: The three-frame animation sequence for the left arrow.
2: The three-frame animation sequence for the down arrow.
3: The numbers for displaying HP and SP values.
A, B and C are the frames for the HP, SP and ATB bars respectively.
D: This is usually kept blank (although I'm not entirely sure what this is used for).
E: These five blocks are for the gauge colors, displayed when the "Battle Layout" is set to "Gauge".
F: This is the gauge for the ATB, which you'll note has two bars instead of one.
Adding Window Text Effects
Using the built-in RGSS/2 script, we can add some cool effects for enhancing or beautifying text, if used properly. These include a shadow effect and outlined text. Both of these scripts should work in both RMXP and RMVX, although I think there's an added font feature in RMVX for creating shadow effects without script.)
with this line:
will result in "Step Count" having a whitish-grey shadow.
Add the following to Window_Base:
Then, as an example, in Window_Steps, replace this line:
with this line:
In the Status Menu, the "Step Count" will now have an outlined effect.
Shadow Effect
Add the following to Window_Base:#--------------------------------------------------- # * Draw Shadow # x : draw spot x-coordinate # y : draw spot y-coordinate # w : width # h : height # text : text to display #---------------------------------------------------- def draw_shadow(x, y, w, h, text) # Display shadow/shadow color self.contents.font.color = Color.new(200, 200, 200, 205) self.contents.draw_text(x + 4, y + 4, w, h, text, 1) # Display normal color text self.contents.font.color = system_color self.contents.draw_text(x, y, w, h, text, 1) endThis will set up the "define procedure" to place it in windows. As an example, in Window_Steps, replacing this line:
self.contents.draw_text(4, 0, 120, 32, "Step Count")
with this line:
draw_shadow(4, 0, 120, 32, "Step Count")
will result in "Step Count" having a whitish-grey shadow.
Outline Effect
This routine will give the text an outline, which might be used for main headings.Add the following to Window_Base:
#--------------------------------------------------
# * Draw Outline
#     x    : draw spot x-coordinate
#     y    : draw spot y-coordinate
#     w    : width
#     h    : height
#     text : text to display
#---------------------------------------------------
def draw_outline(x, y, w, h, text)
  self.contents.draw_text(x + 1, y * 32 + 1, w, h, text, 1)
  self.contents.draw_text(x - 1, y * 32 + 1, w, h, text, 1)
  self.contents.draw_text(x + 1, y * 32 - 1, w, h, text, 1)
  self.contents.draw_text(x - 1, y * 32 - 1, w, h, text, 1)
  self.contents.font.color = Color.new(250, 250, 250, 255)
  self.contents.draw_text(x, y * 32, w, h, text, 1)
end
Then, as an example, in Window_Steps, replace this line:
self.contents.draw_text(4, 0, 120, 32, "Step Count")
with this line:
draw_outline(4, 0, 120, 32, "Step Count")
In the Status Menu, the "Step Count" will now have an outlined effect.
Simple Font Draw
As the title suggests, this is a simple routine for redefining fonts, such as name, size, bold, italic, etc. Although this was written in RMXP, it should also work in RMVX. The default format for manipulating fonts is:
and so on.
But there is a way to merge the different properties into one procedure by adding the following to Window_Base:
This would result in bold 22-size font, set at the default "System Color" (also predefined in the Window_Base).
Other properties can easily be added using the same method. Anything predefined in this way is used as a template for all windows, including the Status and menu screens.
self.contents.font.name = "Font Name"
self.contents.font.size = 22
self.contents.font.size = 22
and so on.
But there is a way to merge the different properties into one procedure by adding the following to Window_Base:
#-------------------------------------------
# * Draw font status
#     bold    : Bold on/off
#     italic  : Italic on/off
#     size    : Font size
#     color   : Font color
#-------------------------------------------
def draw_font(bold, italic, size, color)
  # Check bold on/off
  case bold
  when 0
    self.contents.font.bold = false
  when 1
    self.contents.font.bold = true
  end
  # Check italic on/off
  case italic
  when 0
    self.contents.font.italic = false
  when 1
    self.contents.font.italic = true
  end
  # Change Color
  case color
  when 0
    self.contents.font.color = system_color
  when 1
    self.contents.font.color = normal_color
  when 2
    self.contents.font.color = Color.new(255, 255, 255, 255)
  end
  # Font size
  self.contents.font.size = size
end
Whenever fonts need to be "drawn", something like this would be called in RGSS when the font and its properties are called:draw_font(1, 0, 22, 1)
This would result in bold 22-size font, set at the default "System Color" (also predefined in the Window_Base).
Other properties can easily be added using the same method. Anything predefined in this way is used as a template for all windows, including the Status and menu screens.
System Set - Tutorial Part 1 (RM2K3)
System graphics, in the System folder, are used for the Main and Battle menus. These are some I created (modified) a while ago. They are free to use for any RM2K3 game.
Here are two basic system sets I created using the templates below.
Gold Frame
 This system set sports a gold frame on a black background that gives it a royalty feel.
Parchment
 This system set has a parchment background to give games an archaic look and feel.
Here are some basic templates to enable you to make your own custom system sets.
 This is the basic System layout that determines how the messages appears, including text colors. System sets (imported in the System folder) are for the main interface. The image size is 160x80.
 Breaking the template down into its component parts, we can have a better understanding about how the components work.
The last two rows are for the twenty basic colors used in the game. Each is 16x16 in size. The first four are the "system" colors, where:
System Sets
Here are two basic system sets I created using the templates below.
Gold Frame
 This system set sports a gold frame on a black background that gives it a royalty feel.
Parchment
 This system set has a parchment background to give games an archaic look and feel.
System Templates
Here are some basic templates to enable you to make your own custom system sets.
 This is the basic System layout that determines how the messages appears, including text colors. System sets (imported in the System folder) are for the main interface. The image size is 160x80.
 Breaking the template down into its component parts, we can have a better understanding about how the components work.
A: Size: 32x32. This is the background color of the window.
B: Size: 32x32. This is the frame around the window and up and down arrows for scrolling through options. The arrows are 8x8 in size.
C: Size: 32x32. These two are the patterns used for the command cursor. If they are two different patterns, the cursor will flash rather than be static if they are both the same.
D: These are the four animated arrows used in shops. Each is 8x8 in size, comprising four frames each. The first row is for stat increases, the second is for unequippable items, the third is for stat decreases, and the fourth is when an item is already equipped.
E: Size: 16x16. This is the background color of the menu, used as "opacity".
F: Size: 16x16. This is the letter shadow color, displayed "behind" the letters to give it a shadow effect.
G: These are the numbers used for timers. There are twelve in total, each one 8x16 in size and comprising a set of two numbers, with the last one a colon (or other separator).
H: Size: 16x16. These are the two shadows for airships, which are displayed on the map whenever an airship is used as a vehicle.
B: Size: 32x32. This is the frame around the window and up and down arrows for scrolling through options. The arrows are 8x8 in size.
C: Size: 32x32. These two are the patterns used for the command cursor. If they are two different patterns, the cursor will flash rather than be static if they are both the same.
D: These are the four animated arrows used in shops. Each is 8x8 in size, comprising four frames each. The first row is for stat increases, the second is for unequippable items, the third is for stat decreases, and the fourth is when an item is already equipped.
E: Size: 16x16. This is the background color of the menu, used as "opacity".
F: Size: 16x16. This is the letter shadow color, displayed "behind" the letters to give it a shadow effect.
G: These are the numbers used for timers. There are twelve in total, each one 8x16 in size and comprising a set of two numbers, with the last one a colon (or other separator).
H: Size: 16x16. These are the two shadows for airships, which are displayed on the map whenever an airship is used as a vehicle.
The last two rows are for the twenty basic colors used in the game. Each is 16x16 in size. The first four are the "system" colors, where:
0: The default text color.
1: The stats default color.
2: The color for when stats increase.
3: The color for when stats decrease or when commands are unavailable.
4: The color for when HP or SP decrease.
1: The stats default color.
2: The color for when stats increase.
3: The color for when stats decrease or when commands are unavailable.
4: The color for when HP or SP decrease.
Subscribe to:
Posts (Atom)


Total Pageviews

|
Popular Posts
-
 There are quite a few Online Creators for RMXP/RMVX already, mostly Japanese sites. I recently discovered - quite by accident - a French si...
 -
While going through my bookmarks, I came across a few Faceset Generators, which I thought I'd share. RMVX/RMXP Faceset Generator - I ...
-
If you're not a great graphic artist, like me, there are several websites that allow you to create your own, thus: Character Sprite Gene...
-
 View More Windowskins While playing around with the Windowskin Generator I mentioned in a previous entry, I've created some cool Window...
 -
If you're looking for some quality sprites, then look no further than Magnus Noctem . Unless otherwise specified, these are RMVX sprites...
Featured Post
New Resources for RMMV
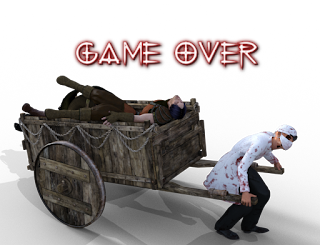
A few RMMV resources have been added today. Game Over Graphics - These have been created with Daz 3D Studio and GIMP , with titles from...
Like This Blog?
Share It

Donate A "Gesture of Appreciation"
Do you like this blog? Then why not consider a donation, however small? It'd be a "Gesture of Appreciation" and some of the money may go towards prizes for future competitions too!Thank you for visiting RPG Maker Times.
Blog Net


Copyright Information
 Contact Us | Terms & Conditions | Privacy Statement
Copyright: © 2008-2017, Companion Wulf - RPG Maker Times. All Rights Reserved.