Image Shack, where most of the images on this blog are stored, is proving to be unreliable. Half of the images don't load half of the time and even in my Image Shack folders it says "Thumbnail Not Available". Image Shack has been quite reliable in the past, but lately it's become progressively worse. I can understand downtime, but this is ridiculous! So now I have the onerous task of using another image host, transferring all of the images to another host, then changing locations in each entry. And there are over 200 images! Ugh!
I had also created a plethora of RMXP windowskins the other day, some of which were converted from a few of the RMVX ones I did. But due to an error in transferring them onto DVD, I lost them. Good job there's a backup somewhere; experience can be a hardnut teacher! So I'll be attempting that again soon.
If "bad" things come in threes, the third hasn't happened yet. Fingers crossed! But I also believe in "third time lucky", regardless if it's bad or not, so whatever the outcome it's going to work out in the end.
11 April 2010
05 April 2010
31 March 2010
27 March 2010
26 March 2010
25 March 2010
23 March 2010
20 March 2010
18 March 2010

Frequently Asked Questions #1
These are answers to some of the simpler questions about RPG Maker I'm asked on a regular basis. Some of these have been taken from Yahoo! Answers. Many of them have been taken from IM'd questions or targeted keywords at Statcounter. You can find a full list of FAQs here.
The font for all windows will now be Times New Roman. Bear in mind, though, that just because you might have a fancy font for your game, that doesn't mean that everyone else will have it and it will invariably generate an error message or the text won't show up in any of the windows.
To rectify this, we will need to set up an array variable to list the available fonts, including alternatives if a particular font isn't available. To do this, place the following outside the Window_Class, i.e. just above the class Window_Base < Window or in a separate module:
Then under Super(), place:
This will then go through the list until it finds the installed font, starting with the first name.
If, however, you want to change the windowskin during the game without affecting the default one, you can use the following:
where "Windowskin_Name" is the name of the windowskin to be used. This is placed under the def initialize, right under the Bitmap setup. You can use this simple method with each instance of a Window, with each one having a different Windowskin.
Are there any online versions of RPG Maker XP or VX?
There aren't any online versions of Enterbrain's RPG Makers, although there are two websites that I know of that boast emulated RPG Makers, thus:- My Game Builder - A fabulous website where you can create games, including RPG Maker type games. In addition to being able to create maps and events, you can also use the built-in editor to create or edit graphics. They have regular competitions in different categories, not just RPGs. Highly recommended if you have a few hours to kill. (You do need to sign up - it's free - to create the games, but not to play them.)
- Flash RPG Maker - You would expect that something on the Newgrounds site would be good, and this one shows great promise. However, it fails miserably for one reason: it's buggy as hell! Not recommended!
How do I change the default font?
To change the default font, which will apply to all windows, in the Window_Base class, directly beneath Super(), place the following:Font.default_name = "Times New Roman"
The font for all windows will now be Times New Roman. Bear in mind, though, that just because you might have a fancy font for your game, that doesn't mean that everyone else will have it and it will invariably generate an error message or the text won't show up in any of the windows.
To rectify this, we will need to set up an array variable to list the available fonts, including alternatives if a particular font isn't available. To do this, place the following outside the Window_Class, i.e. just above the class Window_Base < Window or in a separate module:
FONT_NAME = ["Arial", "Verdana", "Times New Roman"]
Then under Super(), place:
Font.default_name = FONT_NAME
This will then go through the list until it finds the installed font, starting with the first name.
How do I change the default windowskin?
Windowskins are imported into the Graphics/Windowskins folder and then placed into a "Cache". The default windowskin is then set in the Database (under "System").If, however, you want to change the windowskin during the game without affecting the default one, you can use the following:
self.windowskin = RPG::Cache.windowskin("Windowskin_Name")
where "Windowskin_Name" is the name of the windowskin to be used. This is placed under the def initialize, right under the Bitmap setup. You can use this simple method with each instance of a Window, with each one having a different Windowskin.
What is RMVX "batch entry"?
By default message boxes allow only four lines of text. If you check "Batch Entry", you'll be able to exceed the four lines and RMVX will automatically create separate text boxes for you, each containing four lines, which saves you from manually clicking on "Show Text" each time.Charset - Resources Templates (RM2K3)
Charsets represent the animated characters, including NPCs and some events.
Image Size: 288x256, containing up to 8 characters.

Each charset comprises 12 squares, divided into 4 rows of 3 columns, representing the 3 animation frames for each direction.
The top row is where the character is moving upwards (north), the second row is moving right (east), the third is moving down (south), and the bottom row is moving left (west).
Image Size: 288x256, containing up to 8 characters.
Each charset comprises 12 squares, divided into 4 rows of 3 columns, representing the 3 animation frames for each direction.
The top row is where the character is moving upwards (north), the second row is moving right (east), the third is moving down (south), and the bottom row is moving left (west).
System2 Set - Tutorial (RM2K3)
System 2 graphics, located in the System2 folder, are the "Battle Menu Set", used in battles to determine the cursor for targeting enemies and allies. It also displays the ATB bar and the numbers for HP and MP display in gauge type battles (set in the "Battle Layout" options of the Database).
Image Size: 80x96.
This is a "default" template for creating your own System2 designs.

So now, breaking it down into its component elements, we can gain a better insight into how it all fits together.
 1: The three-frame animation sequence for the left arrow.
2: The three-frame animation sequence for the down arrow.
3: The numbers for displaying damage values in battles.
A, B and C are the frames for the HP, SP and ATB bars respectively.
D: This is usually kept blank. Although I don't know precisely what this is used for, most likely this is used for transparencies.
E: These four blocks are for the gauge colors, displayed when the "Battle Layout" is set to "Gauge".
F: This is the gauge for the ATB, which is used for determining times between turns.
Now that we know what each section does, we can add the components. Again, I've used Character Maker 1999 to recreate the System2 set.
 Let's do the arrow animations (1 & 2) first. The first row is for the left arrow and the second is for the down arrow. These arrows can be anything, provided each frame is 16x16 pixels an in sequence.
 Next task is "fleshing out" the stat containers - HP (A), MP (B) and ATB (C). Each one needs to be 8x48 pixels and usually comprises a frame and blank or empty container for the gauge graphics. These can be left completely blank but for aesthetics I always prefer putting something here.
Each gauge - two for HP and MP gauges (E) and one for the ATB gauge (F) - is also 8x48 pixels, but must be positioned centrally against the stat containers so they fit into the blank or empty containers.
 The penultimate addition are the numbers (3), 0 through 9, which are used for damage in combat. They can be any color, font or design provided that each number fits into a 16x16 block.
 The final part of the System2 template is the 16x16 block (D). This is usually kept blank for, I suspect, transparency values.
Image Size: 80x96.
This is a "default" template for creating your own System2 designs.
So now, breaking it down into its component elements, we can gain a better insight into how it all fits together.
1: The three-frame animation sequence for the left arrow.
2: The three-frame animation sequence for the down arrow.
3: The numbers for displaying damage values in battles.
A, B and C are the frames for the HP, SP and ATB bars respectively.
D: This is usually kept blank. Although I don't know precisely what this is used for, most likely this is used for transparencies.
E: These four blocks are for the gauge colors, displayed when the "Battle Layout" is set to "Gauge".
F: This is the gauge for the ATB, which is used for determining times between turns.
Now that we know what each section does, we can add the components. Again, I've used Character Maker 1999 to recreate the System2 set.
Let's do the arrow animations (1 & 2) first. The first row is for the left arrow and the second is for the down arrow. These arrows can be anything, provided each frame is 16x16 pixels an in sequence.
Next task is "fleshing out" the stat containers - HP (A), MP (B) and ATB (C). Each one needs to be 8x48 pixels and usually comprises a frame and blank or empty container for the gauge graphics. These can be left completely blank but for aesthetics I always prefer putting something here.
Each gauge - two for HP and MP gauges (E) and one for the ATB gauge (F) - is also 8x48 pixels, but must be positioned centrally against the stat containers so they fit into the blank or empty containers.
The penultimate addition are the numbers (3), 0 through 9, which are used for damage in combat. They can be any color, font or design provided that each number fits into a 16x16 block.
The final part of the System2 template is the 16x16 block (D). This is usually kept blank for, I suspect, transparency values.
System Set - Tutorial Part 2 (RM2K3)
As part of the new, expansive resource templates tutorials, which will eventually extend to all RPG Makers, this series will demonstrate how to create your own resources from scratch. You can use any graphics editor for editing, but for RM2K3 resources the best program to use is Character Maker 1999.
The first one we'll focus on is the System Set, which is located in the System folder; this is used for the main menus and windows/text boxes.
Image Size: 160x80.
The basic System layout looks like this:
 Once "filled in", this will determine how the messages appear, including text colors, in text boxes and menus; in other words, the main interface.
Breaking the template down into its component parts, we can have a better understanding about how the components work, thus:
 A: Size: 32x32. This is the window background. It can be a single color or gradients, or even an image.
B: Size: 32x32. This is the frame around the window (3 pixels wide) and the up and down arrows for scrolling through options. The arrows are 8x8 in size by default, but for the best results 10x8 is recommended with 2 pixels between each arrow.
C: Size: 32x32. These two are the patterns used for the command cursor. If they are two different patterns, the cursor will flash rather than be static if they are both the same.
D: These are the four animated arrows used in shops. Each is 8x8 in size, comprising four frames each. The first row is for stat increases, the second is for unequippable items, the third is for stat decreases, and the fourth is when an item is already equipped.
E: Size: 16x16. This is the background color of the menu, used as "opacity".
F: Size: 16x16. This is the letter shadow color, displayed "behind" the letters to give it a shadow effect.
G: These are the numbers used for timers. There are twelve in total, each one 8x16 in size and comprising a set of two numbers, with the last one a colon (or other separator). It's important to note that, except for the colon, there are two numbers in each square spaced 1 pixel apart.
H: Size: 16x16. These are the two shadows for airships, which are displayed on the map whenever an airship is used as a vehicle.
The last two rows are for the twenty basic colors used in the game. Each is 16x16 in size. The first four are the "system" colors, where:
So now that we know what each of the components are, let's create an example System Set. I've used Character Maker 1999 for this because it makes it much easier to edit.
 The first thing we need to do is create the window background (A).
For this tutorial, I created a simple blue gradient background. This will now be the background for all windows.
 For the next part, let's create a simple gold border, including gold arrows (B). The white color (default is orange) must be consistent throughout the template, as this will be used to determine transparency. For the cursor command windows (C), they are set to two different background colors, but they can also be the same background colors with slightly different border colors to give that "flashing" effect.
 The next part to modify is the shop cursors (D). Again, I've opted for a goldish and silvery look. As a quick reminder, the top row is for increased stats, the second is unequippable items, the third is for decreased stats, and the fourth is for items already equipped. When purchasing items from shops, the animation will cycle through the animation (frames). These can be any images, provided each individual frame is 8x8 pixels and they are consistent; it will look weird if animations jump from one image to another not in sequence.
 For this next part, the penultimate, it's a simple matter of filling in two squares - the window opacity color (E) and the letter shadow color (F) - with a single color. The opacity color is usually the same as the background color in the first window of C. The shadow color is usually set to black but can be any color as long as it matches the color scheme.
 The final part is where we add the numbers for the timers (G) and the airship shadows (H). Each individual number needs to be 8x16, with a colon and blank square for the spacer.
 The final step is to fill in the white background to the default orange. This will be the transparency color when importing this System Set. (This could have been done earlier, but because we were creating gold lettering and borders, white makes it much easier to work with until the final product.)
The first one we'll focus on is the System Set, which is located in the System folder; this is used for the main menus and windows/text boxes.
Image Size: 160x80.
The basic System layout looks like this:
Once "filled in", this will determine how the messages appear, including text colors, in text boxes and menus; in other words, the main interface.
Breaking the template down into its component parts, we can have a better understanding about how the components work, thus:
A: Size: 32x32. This is the window background. It can be a single color or gradients, or even an image.
B: Size: 32x32. This is the frame around the window (3 pixels wide) and the up and down arrows for scrolling through options. The arrows are 8x8 in size by default, but for the best results 10x8 is recommended with 2 pixels between each arrow.
C: Size: 32x32. These two are the patterns used for the command cursor. If they are two different patterns, the cursor will flash rather than be static if they are both the same.
D: These are the four animated arrows used in shops. Each is 8x8 in size, comprising four frames each. The first row is for stat increases, the second is for unequippable items, the third is for stat decreases, and the fourth is when an item is already equipped.
E: Size: 16x16. This is the background color of the menu, used as "opacity".
F: Size: 16x16. This is the letter shadow color, displayed "behind" the letters to give it a shadow effect.
G: These are the numbers used for timers. There are twelve in total, each one 8x16 in size and comprising a set of two numbers, with the last one a colon (or other separator). It's important to note that, except for the colon, there are two numbers in each square spaced 1 pixel apart.
H: Size: 16x16. These are the two shadows for airships, which are displayed on the map whenever an airship is used as a vehicle.
The last two rows are for the twenty basic colors used in the game. Each is 16x16 in size. The first four are the "system" colors, where:
- 0: The default text color.
- 1: The stats default color.
- 2: The color for when stats increase.
- 3: The color for when stats decrease or when commands are unavailable.
- 4: The color for when HP or SP decrease.
So now that we know what each of the components are, let's create an example System Set. I've used Character Maker 1999 for this because it makes it much easier to edit.
The first thing we need to do is create the window background (A).For this tutorial, I created a simple blue gradient background. This will now be the background for all windows.
For the next part, let's create a simple gold border, including gold arrows (B). The white color (default is orange) must be consistent throughout the template, as this will be used to determine transparency. For the cursor command windows (C), they are set to two different background colors, but they can also be the same background colors with slightly different border colors to give that "flashing" effect.
The next part to modify is the shop cursors (D). Again, I've opted for a goldish and silvery look. As a quick reminder, the top row is for increased stats, the second is unequippable items, the third is for decreased stats, and the fourth is for items already equipped. When purchasing items from shops, the animation will cycle through the animation (frames). These can be any images, provided each individual frame is 8x8 pixels and they are consistent; it will look weird if animations jump from one image to another not in sequence.
For this next part, the penultimate, it's a simple matter of filling in two squares - the window opacity color (E) and the letter shadow color (F) - with a single color. The opacity color is usually the same as the background color in the first window of C. The shadow color is usually set to black but can be any color as long as it matches the color scheme.
The final part is where we add the numbers for the timers (G) and the airship shadows (H). Each individual number needs to be 8x16, with a colon and blank square for the spacer.
The final step is to fill in the white background to the default orange. This will be the transparency color when importing this System Set. (This could have been done earlier, but because we were creating gold lettering and borders, white makes it much easier to work with until the final product.)
Windowskin Maker XP
A lot of people lately have been searching for Windowskin Generators to make life easier. No doubt regular visitors to this blog (or the forums) already know about the RMVX Windowskin Generator, which is a superlative utility that I use frequently.
Unfortunately, there has been no RMXP equivalent...Until now!
The talented Evil Cabbage has created just the utility. It's available for download (from RMXP Unlimited) here. Right-click on the "Download" link and Save As for it to work.
Now there are opportunities aplenty for us "non-artists" to create windowskins for both our RMXP and RMVX projects!
A full, light review is available here.
Unfortunately, there has been no RMXP equivalent...Until now!
The talented Evil Cabbage has created just the utility. It's available for download (from RMXP Unlimited) here. Right-click on the "Download" link and Save As for it to work.
Now there are opportunities aplenty for us "non-artists" to create windowskins for both our RMXP and RMVX projects!
A full, light review is available here.
More Windowskins VX #6
Here are some more parchment type RMVX windowskins that I found lurking on my hard drive. As always I assume they were created with the Windowskin Generator and Paint Shop Pro combination. Also as usual, these are also placed on the sister blog, RPG Maker Times Companion, where you can collectively view the other RMVX and RMXP windowskins. Right-click and save the image to your hard drive.
Dark Bronze Parchment |
Dark Parchment |
|---|---|
Feather Parchment |
Light Parchment |
RMTool
Direct Download
This utility scans RPG Maker games for missing files and gives instructions on how to fix it. For example, if a MIDI or particular graphics file is missing from the game's Project folder, this tool will tell you which one is missing.

RMTool - Scan Resources
If any files are missing, you can then import those resources into your project. The program will then "fix" the missing files.

RMTool - Import Missing Resources
Note: The program was specifically made for RM2K, but works as well with RM2K3, except for 2K3-specific folders (i.e. System2, BattleChars, CharSets, etc.); they just won't be scanned.
RMTool - Scan Resources
If any files are missing, you can then import those resources into your project. The program will then "fix" the missing files.
RMTool - Import Missing Resources
Note: The program was specifically made for RM2K, but works as well with RM2K3, except for 2K3-specific folders (i.e. System2, BattleChars, CharSets, etc.); they just won't be scanned.
Windowskin Generator VX
Direct DownloadI found this awesome and very useful utility. It's a Windowskin Generator, programmed by Woratana and with graphics by Aindra, for RMVX and it works!
The idea behind this is to make Windowskin creation easy by selecting various parts and applying them to the skin. It even has a preview area where you can see what the resultant image will look like! Once you're done, the finished product can be saved and imported into RMVX for use in your games.

Download it directly here, then extract it to the RMVX Projects folder (using WinRar or Winzip) and open it up in the RMVX program.
It can be run directly from RMVX or as a standalone program. If used as standalone, the RGSS2002e.dll may be needed. Information on creating and running standalone games (including downloading the appropriate files) can be found on the RPG RPG Revolution forum.
Download it directly here, then extract it to the RMVX Projects folder (using WinRar or Winzip) and open it up in the RMVX program.
It can be run directly from RMVX or as a standalone program. If used as standalone, the RGSS2002e.dll may be needed. Information on creating and running standalone games (including downloading the appropriate files) can be found on the RPG RPG Revolution forum.
Chapter 8: Items by Level (Hero Level) - The Complete Chests Tutorial
Chests can contain higher-level items, such as weapons, which are only accessible when a character reaches a certain level. If the character is the required level, they can open the chest, otherwise it remains closed. This is easy to do, thus:
Set up the basic chest (from Part 1), setting the chest name to "Chest 8" and the switch precondition on Page 2 to "Chest 8 Opened" also.
In the Events Commands, we need to set up a Branch Condition to check the Hero's level. If it's the required level, the chest is opened as usual. If not, a message is displayed stating the you are not a high enough level to receive the item.
The complete code is:
Set up the basic chest (from Part 1), setting the chest name to "Chest 8" and the switch precondition on Page 2 to "Chest 8 Opened" also.
In the Events Commands, we need to set up a Branch Condition to check the Hero's level. If it's the required level, the chest is opened as usual. If not, a message is displayed stating the you are not a high enough level to receive the item.
The complete code is:
<>Branch if Zack Level is 2 or more
  <>Play Sound: open1
  <>Move Event: This Event, Face Right
  <>Wait: 0.2 Sec
  <>Move Event: This Event, Face Up
  <>Wait: 0.2 Sec
  <>Move Event: This Event, Face Left
  <>Wait: 0.2 Sec
  <>Change Items: Potion 1 Add
  <>Message: Potion received.
  <>Switch Operation: [0009:Chest 8 Opened] ON
  <>
: Else Handler
  <>Message: You are not a high enough level to
  :               receive the item.
: End
<>
To increase the level required, simply change the value in the Branch Condition, and the item accordingly. Additional Branch Conditions and items can be added (in the Else Handlers) for additional levels.
Subscribe to:
Posts (Atom)


Total Pageviews
|
|
Popular Posts
-
 There are quite a few Online Creators for RMXP/RMVX already, mostly Japanese sites. I recently discovered - quite by accident - a French si...
-
While going through my bookmarks, I came across a few Faceset Generators, which I thought I'd share. RMVX/RMXP Faceset Generator - I ...
-
If you're not a great graphic artist, like me, there are several websites that allow you to create your own, thus: Character Sprite Gene...
-
 View More Windowskins While playing around with the Windowskin Generator I mentioned in a previous entry, I've created some cool Window...
-
If you're looking for some quality sprites, then look no further than Magnus Noctem . Unless otherwise specified, these are RMVX sprites...
Featured Post
New Resources for RMMV
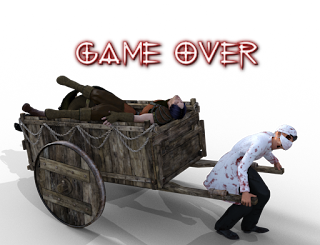
A few RMMV resources have been added today. Game Over Graphics - These have been created with Daz 3D Studio and GIMP , with titles from...
Like This Blog?
Share It

Donate A "Gesture of Appreciation"
Do you like this blog? Then why not consider a donation, however small? It'd be a "Gesture of Appreciation" and some of the money may go towards prizes for future competitions too!Thank you for visiting RPG Maker Times.
Blog Net


Copyright Information
 Contact Us | Terms & Conditions | Privacy Statement
Copyright: © 2008-2017, Companion Wulf - RPG Maker Times. All Rights Reserved.