I have two days off (from tomorrow) so will spend the time tweaking and updating all Scripts/Scriptlets. They'll also be uploaded to Pastebin, providing the option to copy and paste them directly or download a text version from the site.
Saturday is my last work-night before I have a week's holiday, which will give me the chance to finally make some proper progress on my project, Otherworld.
I'm hoping to finally publish Version 4.0 of the Q-Engine, along with its add-ons, following some additional testing and tweaks.
We'll see how things go. My priority IS Otherworld, however, and creating something of more substance.
Showing posts with label RGSS. Show all posts
Showing posts with label RGSS. Show all posts

Map/Compass HUD Script (RMXP) - New Script

Originally written specifically for my upcoming RMXP project Paranormality: Portals, but I decided to release it as a standalone plug-and-play script.
Tweaks & Add-Ons Script RMXP (TWAXP)
The Tweaks & Add-Ons script is available. It adds several tweaks to RMXP, including for layout. It also adds some unavailable features and functions and other enhancements.
Read more about it on the Tweaks & Add-Ons page.
Read more about it on the Tweaks & Add-Ons page.
Press Any Key Script (RMXP/VX/VXA)
You know how some games have a "Press Any Key" on the title screen in place of or before the main menu? Now, I've been wanting to write a script like this for a while. In fact, I started writing one for the Q-Engine.
Here's a script that does just that. And the best thing it works with RMXP, RMVX and RMVXA.

Here's a script that does just that. And the best thing it works with RMXP, RMVX and RMVXA.
Advanced Time Scripts/Day and Night Systems
A common question I'm asked is about Time/Date System Scripts. Here's a list of some of better ones:
These include the ability to store time as variables and time-based events triggers.
- Blizzard's Advanced Time and Environment System (ATES) (RMXP)
- Day/Night Evented System (RMVX)
- Kylock's Time System (RMVX)
- Rafidelis Advanced Time System (RMVX)
- Real Time KTS Mod
- Trickster's Time System (RMXP)
These include the ability to store time as variables and time-based events triggers.
Customizing Menus - Part 2: Inside The Menu
In Part 1, we dealt with the basic menu structure and how the the commands are displayed and called. Part 2 expands on that and details how to execute the routines when the menu item is selected.
Scroll down to case @command_window.index (line 123 in RMXP and line 88 in RMVX). This is where the execution methods are defined, telling RPG Maker that when a menu item (the menu index if you recall) is selected, call the appropriate command.
This is processed in the definition update_command in RMXP and update_command_selection in RMVX. And this is where we need to change the code so that it does what it's supposed to do when the menu item is selected. The default structure is as follows:
Scroll down to case @command_window.index (line 123 in RMXP and line 88 in RMVX). This is where the execution methods are defined, telling RPG Maker that when a menu item (the menu index if you recall) is selected, call the appropriate command.
This is processed in the definition update_command in RMXP and update_command_selection in RMVX. And this is where we need to change the code so that it does what it's supposed to do when the menu item is selected. The default structure is as follows:
Customizing Menus: Part 1 - Menu Structure
In this multi-part tutorial, I'll demonstrate how to customize the default menu (Scene_Menu) in both RMXP and RMVX. Scripting the menu is more frustrating than difficult because it doesn’t allow you to simply append new commands to the existing menu and only the menu items manually added into the menu script will appear. So we have to manually add them to form our basic menu. (That said, for the non-scripters, SojaBird's excellent New Menu Items script makes it easier to collate existing menu items and add new ones.)
For the purpose of this tutorial, however, we'll be modifying the existing Scene_Menu to add an Extra Stats window. First thing's first, let's explore how the menu structure is set up.
The basic structure for the menu in each RPG Maker is the same, but RMVX also has the additional option of multi-columns in the menu, which we'll cover later.
By default, it's set to 0, the first item on the menu list. The number increases by one for every menu item below the first command, which means that every time the cursor is moved down to the next command it increases by one. Conversely, if the cursor is moved up one command the index decreases by one. So, if you were to set the menu_index to 4, when you open the status menu the cursor would default to "Save" every time you open it.
For the purpose of this tutorial, however, we'll be modifying the existing Scene_Menu to add an Extra Stats window. First thing's first, let's explore how the menu structure is set up.
The basic structure for the menu in each RPG Maker is the same, but RMVX also has the additional option of multi-columns in the menu, which we'll cover later.
Initialize The Menu Index
The first section sets the command cursor's initial position.
def initialize(menu_index = 0)
@menu_index = menu_index
end
@menu_index = menu_index
end
By default, it's set to 0, the first item on the menu list. The number increases by one for every menu item below the first command, which means that every time the cursor is moved down to the next command it increases by one. Conversely, if the cursor is moved up one command the index decreases by one. So, if you were to set the menu_index to 4, when you open the status menu the cursor would default to "Save" every time you open it.
Parameter Increase/Decrease Icons
The default Equipment screen, where you can equip and unequip weapons and armor, is rather boring in my opinion, so here's a simple RMVX script to enhance it.
 Now, whenever you equip or unequip items an icon will appear next to the appropriate "parameter", according to whether the stat is increased or decreased.
Place the script above Main. I'd recommend placing it somewhere at the top, below other scripts that modify the equipment scenes.
The script overwrites the following definitions in the Window_EquipStatus class: new_parameter_color and draw_parameter.
 Now, whenever you equip or unequip items an icon will appear next to the appropriate "parameter", according to whether the stat is increased or decreased.
Place the script above Main. I'd recommend placing it somewhere at the top, below other scripts that modify the equipment scenes.
The script overwrites the following definitions in the Window_EquipStatus class: new_parameter_color and draw_parameter.
Extra Stats Window Script
I wrote this script while studying the Battle_Scene class with the intentions of creating a Custom Battle Scene for TGP.

The Extra Stats window can be accessed from the menu to display the following stats:

The Extra Stats window can be accessed from the menu to display the following stats:
Game Progress Script
 I originally wrote this script for RMXP, although adapted to RMVX (both scripts are available below).
Sometimes it's useful to know how far into a game you are. This script measures your progress in the form of a percentage (click on the screenshot to see what I mean). When you have completed certain tasks, you can add to the progress percentage.
The inspiration for this particular script came when I was reviewing the Status for my game, The Gladiator Project (TGP), thinking that something was missing, though I just didn't know what.
But then it came to me that, since some Roman Gladiators fought their way to the top, I figured why not have some kind of measurement on how close to "freedom" you are. So here's the script.
To install:
Scripting Nightmares
When it comes to scripts, I personally do not like those that directly modify or overwrite the "default" scripts, especially the menus and command positioning. While most are designed as simple plug 'n play scripts to make their implementation quick, simple and easy, they do invariably interfere.
A prime example is where you have created your menu as you want it, then you "install" someone else's script, which calls on a new window or scene, and it modifies that script. The result is that sometimes the selection cursor returns to a different position after canceling and returning to the menu.
What this means is that you need to sift through and determine which part of the script is interfering with the positioning and tweak it. It's not difficult to do, just annoying.
It might be better if aliasing or pushing (or, indeed, some other method of insertion) were used instead - whatever that may be, instead of directly modifying the code. But again, ease-of-use and simple plug 'n play does make life much simpler, especially with those not too familiar with RGSS. Then, when it comes to actually making the necessary modifications, it helps a little in learning about RGSS.
Even now, I'm not a great scripter per se, although I have learned so much just by studying (and experimenting with) others' coding. I've also studied various resources on Ruby - upon which RGSS is based - so that what needs to be done in my projects can be done efficiently.
Kudos to those who have studied Ruby and RGSS to the point where they have a thorough, working knowledge of it. Ruby script is not hard to learn, just labor-intensive at times to get to that point.
A prime example is where you have created your menu as you want it, then you "install" someone else's script, which calls on a new window or scene, and it modifies that script. The result is that sometimes the selection cursor returns to a different position after canceling and returning to the menu.
What this means is that you need to sift through and determine which part of the script is interfering with the positioning and tweak it. It's not difficult to do, just annoying.
It might be better if aliasing or pushing (or, indeed, some other method of insertion) were used instead - whatever that may be, instead of directly modifying the code. But again, ease-of-use and simple plug 'n play does make life much simpler, especially with those not too familiar with RGSS. Then, when it comes to actually making the necessary modifications, it helps a little in learning about RGSS.
Even now, I'm not a great scripter per se, although I have learned so much just by studying (and experimenting with) others' coding. I've also studied various resources on Ruby - upon which RGSS is based - so that what needs to be done in my projects can be done efficiently.
Kudos to those who have studied Ruby and RGSS to the point where they have a thorough, working knowledge of it. Ruby script is not hard to learn, just labor-intensive at times to get to that point.
Victory Count Script
I was asked some time ago how to add a "Victory Count" - i.e. a counter for the number of battles won - so decided to experiment and this is the result. This is a very simple script modification, directly modifying various parts of the code.
Game_System
Under the Public Instance Variables, add the following:
Under initialize, add:
Scene_Battle
Look for def display_exp_and_gold, place the following underneath $game_party.gain_gold(gold):
Scene_Menu
In def start, add:
In def terminate, add:
In def update, add:
Create a new entry, entitled Window_Victory, and paste the following code:
This will display the "# Victories" on the Status Menu. It can be expanded for other things as well, such as the number of saves, the number of inn stays, etc.
Game_System
Under the Public Instance Variables, add the following:
attr_accessor :victory_count # number of victories
Under initialize, add:
@victory_count = 0
Scene_Battle
Look for def display_exp_and_gold, place the following underneath $game_party.gain_gold(gold):
$game_system.victory_count += 1
Scene_Menu
In def start, add:
@victory_window = Window_Victory.new(0, 175)
In def terminate, add:
@victory_window.dispose
In def update, add:
@victory_window.update
Create a new entry, entitled Window_Victory, and paste the following code:
class Window_Victory < Window_Base
  #--------------------------------------------------------------------------
  # * Object Initialization
  #--------------------------------------------------------------------------
  def initialize(x, y)
    super(x, y, 160, WLH + 32)
    self.contents = Bitmap.new(width - 32, height - 32)
    self.contents.font.size = 16
    refresh
  end
  #--------------------------------------------------------------------------
  # * Refresh
  #--------------------------------------------------------------------------
  def refresh
    return if Graphics.frame_count % 10 != 0
    self.contents.clear
    self.contents.draw_text(0, WLH * 0, 120, WLH, "# Victories:")
    self.contents.draw_text(0, WLH * 0, 120, WLH, $game_system.victory_count.to_s, 2)
  end
  #--------------------------------------------------------------------------
  # * Frame Update
  #--------------------------------------------------------------------------
  def update
    super
    refresh
  end
end
This will display the "# Victories" on the Status Menu. It can be expanded for other things as well, such as the number of saves, the number of inn stays, etc.
Real Time KTS Mod
This is in answer to Miaucho's question (in the comments) about how it would be possible to rename the months to something else and is a followup to the Kylock Time System Script I posted a while ago.
While I have an intermediate understanding of RGSS at the moment, I will experiment on my own. That's how I learn things. Thing is I couldn't quite figure out how to implement the month array into the time system without encountering a few problems. My mind drew a blank.
Anyway, I found the Real Time KTS Mod by accident. This is a modification of Kylock's, but it's a very good one at that, utilizing the system clock for real time. Its rich array of features include:
The demo version can also be downloaded here.
It should be easy to rename the months by placing an array in the KTS Module, something like:
Then calling it later (in getMonthName):
And that should work. (I can't thoroughly test it yet - but I will soon - as my copy of RMVX isn't working properly for some reason!)
While I have an intermediate understanding of RGSS at the moment, I will experiment on my own. That's how I learn things. Thing is I couldn't quite figure out how to implement the month array into the time system without encountering a few problems. My mind drew a blank.
Anyway, I found the Real Time KTS Mod by accident. This is a modification of Kylock's, but it's a very good one at that, utilizing the system clock for real time. Its rich array of features include:
- Current Time (hours, minutes and seconds)
- Current Date (weekday, month and year)
- Seasons
- Weather (according to season)
The demo version can also be downloaded here.
It should be easy to rename the months by placing an array in the KTS Module, something like:
MONTH_NAME = ["Month One", "Month Two" ... etc.]
Then calling it later (in getMonthName):
monthname = KTS::MONTH_NAME[@month]
And that should work. (I can't thoroughly test it yet - but I will soon - as my copy of RMVX isn't working properly for some reason!)
Time/Date Formats
In yesterday's entry, System Time/Date Script, I showed how to use the built-in Time function to display the current (system) time and date.
To change format, the strftime method has a number of options available.
Its basic format is
where format is the format string to be used, which may be specified with the following:
So, as an example, to display the full date, including day, month and year, strftime would be set to:
The result would be
And that's it!
To change format, the strftime method has a number of options available.
Its basic format is
strftime(format)
where format is the format string to be used, which may be specified with the following:
- %A - Full day of the week (Sunday, Monday, etc.)
- %a - Abbreviated day of the week (Sun, Mon, etc.)
- %B - Full month (January, February, etc.)
- %b - Abbreviated month (Jan, Feb, etc.)
- %c - Current Date and Time (system clock format)
- %d - Day of the month (01-31)
- %H - Time of day in 24-hour format (00-23)
- %I - Time of day in 12-hour format (01-12)
- %j - Day of the year (001-366)
- %M - Minutes (00-59)
- %m Numerical month of the year (01-12)
- %p - Displays AM or PM after the time
- %S - The number of seconds (00-60, 60 being a "leap second")
- %U - Week of the year, the first week starting with the first Sunday (00-53)
- %W - Week of the year, the first week starting with the first Monday (00-53)
- %w - Day of the week (0-6, 0 denoting Sunday)
- %X - Displays the Time
- %x - Displays the Date
- %Y - Displays the Year as a 4-digit number (2009)
- %y - Displays the Year as a 2-digit number (00-99)
- %Z - Displays the default (system) Time Zone
- %% - Displays a % character
So, as an example, to display the full date, including day, month and year, strftime would be set to:
strftime = ("%A, %d %B, %Y")
The result would be
Tuesday, 20 May, 2009
And that's it!
System Time/Date Script
RMXP and RMVX has a built-in Time function that allows the display of the current date and time (based on the system clock). I found this by accident while sifting through the Help file - actually while searching for Bitmap and Sprite management - and after some experimentation discovered how to place it in windows.
To use it, there are two functions to be aware of:
This reads the current time and date from the system clock.
This converts the time into a string, using the time of day (in 12-hour format), minutes and seconds, as well as showing AM/PM.
So to add the time and date, we can add the following:
What this will do is store the time/date stamp format into variables and convert them to strings so that they can then be "drawn" in a window.
In RMXP, the following script can be used to replace the default. In RMVX, create a new script called Window_PlayTime:
To make this work in RMVX, add the following to Scene_Menu:
In the start definition routine, add
where X and Y are the x- and y-coordinates for the window placement.
Add the following to the terminate definition routine:
This is to ensure that the window doesn't stay onscreen when the status menu has been exited.
And finally, add the following to the update definition routine:
This is to ensure that the time refreshes every second while on the status menu.
The resultant "Play Time" window should now contain the current time and date, thus:
And that's it, but the strftime element does have a number of different format options, which I'll detail in the next entry.
To use it, there are two functions to be aware of:
Time.now
This reads the current time and date from the system clock.
strftime("%I:%M:%S %p")
This converts the time into a string, using the time of day (in 12-hour format), minutes and seconds, as well as showing AM/PM.
So to add the time and date, we can add the following:
t = Time.now
time = t.strftime("%I:%M:%S %p")
date = t.strftime("%a, %d %b, %Y")
time = t.strftime("%I:%M:%S %p")
date = t.strftime("%a, %d %b, %Y")
What this will do is store the time/date stamp format into variables and convert them to strings so that they can then be "drawn" in a window.
In RMXP, the following script can be used to replace the default. In RMVX, create a new script called Window_PlayTime:
#=================================================================
# ** Window_PlayTime
#-----------------------------------------------------------------
#  This window displays play time on the menu screen.
#=================================================================
class Window_PlayTime < Window_Base
  #---------------------------------------------------------------
  # * Object Initialization
  #---------------------------------------------------------------
  def initialize
    super(0, 0, 160, 64)
    self.contents = Bitmap.new(width - 32, height - 32)
    refresh
  end
  #---------------------------------------------------------------
  # * Refresh
  #---------------------------------------------------------------
  def refresh
    self.contents.clear
    self.contents.font.size = 16
    t = Time.now
    time = t.strftime("%I:%M:%S %p")
    date = t.strftime("%a, %d %b, %Y")
    self.contents.font.color = normal_color
    self.contents.draw_text(0, -2, 140, WLH, date, 1)
    self.contents.draw_text(0, 14, 140, WLH, time, 1)
  end
  #---------------------------------------------------------------
  # * Frame Update
  #---------------------------------------------------------------
  def update
    super
    if Graphics.frame_count / Graphics.frame_rate != @total_sec
      refresh
    end
  end
end
RMXP will display the replacement time/date in the default "Play Time" window on the menu status.To make this work in RMVX, add the following to Scene_Menu:
In the start definition routine, add
@window_playtime = Window_PlayTime.new
@window_playtime.x = X
@window_playtime.y = Y
@window_playtime.x = X
@window_playtime.y = Y
where X and Y are the x- and y-coordinates for the window placement.
Add the following to the terminate definition routine:
@window_playtime.dispose
This is to ensure that the window doesn't stay onscreen when the status menu has been exited.
And finally, add the following to the update definition routine:
@window_playtime.update
This is to ensure that the time refreshes every second while on the status menu.
The resultant "Play Time" window should now contain the current time and date, thus:
Tue, 19 May, 2009
12:33:22 PM
12:33:22 PM
And that's it, but the strftime element does have a number of different format options, which I'll detail in the next entry.
Subscribe to:
Posts (Atom)


Total Pageviews
|
|
Popular Posts
-
 There are quite a few Online Creators for RMXP/RMVX already, mostly Japanese sites. I recently discovered - quite by accident - a French si...
 -
While going through my bookmarks, I came across a few Faceset Generators, which I thought I'd share. RMVX/RMXP Faceset Generator - I ...
-
If you're not a great graphic artist, like me, there are several websites that allow you to create your own, thus: Character Sprite Gene...
-
 View More Windowskins While playing around with the Windowskin Generator I mentioned in a previous entry, I've created some cool Window...
 -
If you're looking for some quality sprites, then look no further than Magnus Noctem . Unless otherwise specified, these are RMVX sprites...
Featured Post
New Resources for RMMV
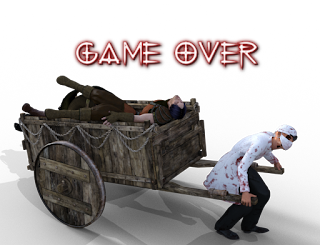
A few RMMV resources have been added today. Game Over Graphics - These have been created with Daz 3D Studio and GIMP , with titles from...
Like This Blog?
Share It

Donate A "Gesture of Appreciation"
Do you like this blog? Then why not consider a donation, however small? It'd be a "Gesture of Appreciation" and some of the money may go towards prizes for future competitions too!Thank you for visiting RPG Maker Times.
Blog Net


Copyright Information
 Contact Us | Terms & Conditions | Privacy Statement
Copyright: © 2008-2017, Companion Wulf - RPG Maker Times. All Rights Reserved.